Search This Blog

Sunday, January 27, 2013

Grilled steak tips with roasted broccoli and garlic mashed....


There's going to be a lot going on in this blog.  I want to share a really great marinade with you, as well as the secret to my famous garlic mashed potatoes, and finally a delicious recipe for broccoli.  I'll start with the marinade:


1/2 cup vegetable oil
1/4 cup soy sauce
2 tbs and 2 tsp of red wine vinegar
2 tbs of lemon juice
1 tbs and 1 1/2 tsp Worcestershire sauce
1 1/2 tsp freshly ground pepper
1 tbs Dijon-style mustard
1/2 onion, sliced
1 clove garlic, sliced
1 tbs Tarragon

Pour this over your steak, and mix in the onion and garlic.  I leave it out on the counter to marinade, because steak cooks best when it is room temperature.


The next thing I get ready are the potatoes.  I love using new potatoes, and like to leave the skin on, just not all of it!  I peel strips off so that when I mash them, there will just be small pieces of the skin mixed in.    Once they are semi-peeled, I cut them up and put them in a pot of water, along with alot of sliced fresh garlic along with some sea salt.


Once these are cooked, I am going to add a block of cream cheese, butter, 1/2 and 1/2, Parmesan cheese, salt and pepper, and some onion powder. If I have sour cream, I'll add some of that as well.  Making these mashed potatoes involves alot of taste-testing.  I never measure anything, so if I don't taste enough of any one ingredient, I simply add more!


And now for the broccoli.  As I have said before, I am into roasting vegetables, and so far I haven't found one that didn't taste good cooked that way!  The process is pretty much the same when it comes to the roasting part.  In a bowl, coat the broccoli with olive oil, salt and pepper.  Then spread it out on a cookie sheet in a single layer.  Heat your oven to 400 degrees, and roast for 20-25 minutes, stirring every once in a while.  I have a lot of broccoli to cook, so I do it in batches.


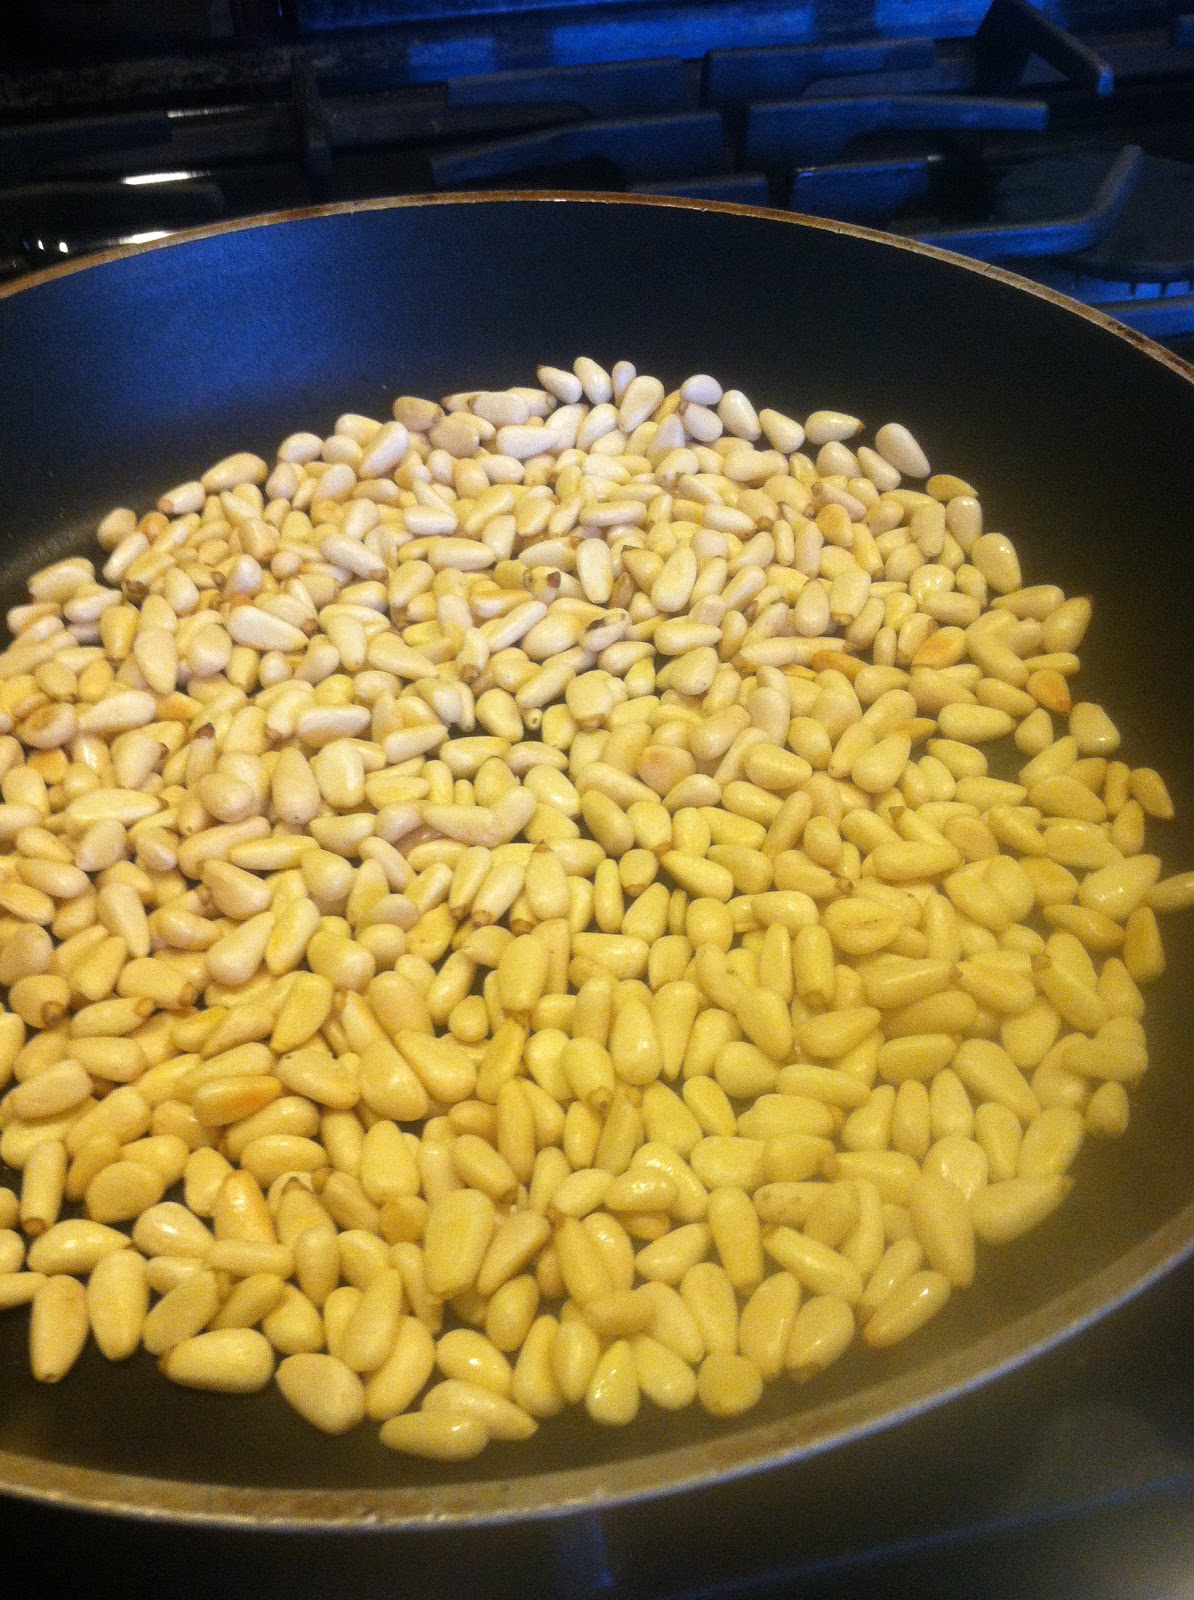
While that is roasting, I pour approximately one cup of pine nuts in a fry pan and toast them until they are light brown.  You have to watch them and stir constantly, because they can go from not being toasted, to being overly toasted in a heartbeat!  As soon as they are done, remove from the pan and set aside in a bowl.


Once I have the broccoli cooked, I put it back in the bowl and mix in the zest of 1 lemon, a little more olive oil, the pine nuts, and some shredded Parmesan cheese.  That's it!  If I had any fresh basil, I would have cut some up and sprinkled that in as well.


It is now time to brave the frigid temps and grill the steak tips.  Luckily they only take about 20-30 minutes, so with the right coat and a glass of wine, I should be alright!


Steak is done, broccoli is done, and the garlic mashed are staying warm on the stove.... time to eat!


This should hopefully get a comment or two from my friends in Michigan!!!


Saturday, January 26, 2013

Simple and delicious chicken parm


Tonight needs to be an easy night for me, seeing as I will be driving and picking up kids right around dinner time.   For some reason I felt like chicken parm, but I wanted the coating on the chicken to be something different.


I start by soaking the chicken breasts in buttermilk for about 30 minutes, turning every once in a while.


While they soak, I try something different instead of plain seasoned breadcrumbs.  I create a mixture of crushed Ritz crackers, some panko crumbs and a small amount of seasoned breadcrumbs.  I add some garlic powder and a little salt.


I take my favorite cast iron fry pan and add a little olive oil.  When it is good and hot, I take one chicken breast at a time and coat it with the crumb mixture.  I press down on the chicken so a fair amount will stick.  Then, I cook them until they are a nice golden brown.


When they are done, I place them in a casserole dish.   I had some fresh mozzarella cheese in the fridge, so I cut it up and scattered it over the chicken, along with some fresh basil.  I cheat and use a jar of Barilla roasted garlic tomato sauce to pour over everything.  Then it is into a 325 degree oven for about 20-30 minutes.  I just want to make sure the chicken finishes cooking and cheese melts.


While the chicken is in the oven, I boil up some pasta to have with the chicken...


Yum!

Very easy and low-maintenance.....not many dishes either!  The crumb mixture I put together was exactly what I was looking for.  Don't be afraid to add even more ingredients and seasonings......When you are experimenting, take a small amount and taste it after each addition.  If it doesn't taste good, dump it out and try again.  Once you find the right combination, you can add it to the rest of the mixture.


Friday, January 25, 2013

Making something out of nothing!


I am going to begin this post by showing you the ingredients I found in my refrigerator.  I had no idea what I was going to do with them, I just knew it was too darn cold to go to the store, and I was determined to make this work!


First off, cook some pasta.  I had two bags that were half gone, so I combined them and got them going.


While the pasta is simmering, I decide it is a good time to start cutting things up.  I had found some sliced Sopressata, so I diced that.  I used up a box of cherry tomatoes, by slicing them as well.  None of these ingredients need cooking, so I leave them to the side until it is time to put everything together.


I had found a bag of frozen meatballs that I though would taste good as the "meat" part of this creation, so I warmed them up and cut them in half.


The pasta is done, so I drain it and combine everything I have so far.


 What's left on my counter now is a box of spinach, and the fresh mozzarella.  I gratefully use up my spinach and fold it in.  I turn the flame on low, so that the heat will slightly wilt it.


The only thing left to do is create some kind of light sauce to tie all the flavors together, and add the mozzarella.  I had a bottle of ranch dressing that I thought would do the trick, so I drizzled some over the top and gently mixed it in.

It turned out to be a good choice!  I diced the mozzarella, gave it a few stirs, and sprinkled the whole thing with a touch of crushed red pepper.


 As the low heat reaches the cheese, it begins to melt just slightly, which is perfect!


So there you have it...... I was able to use up a bunch of things I have had lingering in my refrigerator and cabinets, and when all is said and done, this dinner came out delicious!


Salmon topped with tomatoes, olives, and cinnamon...


This is such an easy meal to prepare.  I start by dicing a Vidalia onion and sauteing it in a little olive oil.  When it is done, I add a can of diced tomatoes that I drained, and about a cup of sliced Kalamata olives. I also put a couple of chopped garlic cloves and some fresh parsley.  And for seasonings, salt, pepper, and about 1/2 tsp. of cinnamon.  The combination of onion, tomato, and cinnamon is so delicious.


 Make sure you can taste the garlic and cinnamon.  If not, then add a little more.  You can also adjust the salt and pepper, or maybe even add something else if you like.


I get a box of rice pilaf cooking, so that it will be done around the same time as the salmon.


When the topping is all set, spoon it over your salmon and pop it into a 400 degree oven for 15-20 minutes.


And, here you go.....The fish was nice and moist, the sauce compliments it so well, and the rice?  Well, rice goes great with anything that has a sauce!  Enjoy.


Tuesday, January 22, 2013

Beef Barley Soup warms the soul....


I wanted to make this soup without going to the grocery store at all cost!  It is just too darn cold outside.... so I read a whole bunch of recipes for Beef Barley soup, just to get started.  I had all the basics, so I breathed a sigh of relief and started chopping carrots, Vidalia onion, garlic and celery.


I put them in my soup pot, along with a couple of tablespoons of butter, and some thyme.  Once they begin to feel tender, I add one box of beef broth, and let that simmer off to the side.  Now for the beef part.  Turns out the only beef I had in the freezer besides hamburger, was a bag of steak tips.  I figure, why not?  it's beef......right?

So I cut them up into bite-sized pieces and brown them in a dry pan.  I find if I add any type of oil or butter, the beef begins to cook in it's own juice instead of browning.   The meat doesn't have to be cooked through, because it will finish cooking in the soup.

Once it is browned, I add it to my soup pot and let the soup simmer on low for about an hour.  This is where I tend to veer away from any recipes I have read, and think about what other seasonings I want to add..

I decide to throw in about 3 bay leaves, some fresh parsley, and a little more thyme.  I take a taste and find that I taste a lot of celery and carrots, and it seems a little too salty for me, so I add a couple of cups of water......  much better. I wonder if Worcestershire sauce would be good in it?  I put a small amount of soup into a bowl, and try it.  Wow!  great idea.  I probably add about a tablespoon worth, and taste again.


The last thing to add is the barley.  I have to laugh, because I was talking to a friend today, who said that a couple of times they tried to make Beef Barley soup, and ended up adding too much because it looks so small and innocent when it is uncooked, and it doesn't need to cook for more than about 20 minutes.  If left too long, it puffs up and doubles in size!

So I think I added  a half cup for the size pot I was using, which is smaller than I normally use.  I'm trying to practice making smaller portions, now that 3 of my 4 kids are all back to school and I only have to cook for 3 people!

Unfortunately, by the time my soup was done, no one was hungry, so it has now become a leftover!  Fortunately, soup only gets better the longer it sits around, so hopefully it will be dinner tonight!


stay warm......


Friday, January 18, 2013

Lamb Shanks with a different sauce...


If you look back, you will see that I have previously posted a recipe for lamb shanks.  That recipe is slightly different from this one, only because I seem to make them up as I go along, and I can never do the same thing twice!  Last night, I decided not to do the typical onions, peppers, garlic, chicken broth route. 

The first step in this amazing meal, is to sprinkle garlic powder, onion powder, salt and pepper all over the shanks.  You need to brown all sides of them in a relatively hot pan.  Once you have a good crust on them, place them in a deep roasting pan.


Use your browning pan to create the sauce.  Start by sauteing a chopped Vidalia onion.  Add to that about 3 ribs of celery. Once they are tender, pour in your can of tomatoes and a box of beef broth.


As for seasonings, I go with 3-4 chopped garlic cloves, fresh basil, some thyme, rosemary, and ground pepper.  You want the shanks to be as covered by the sauce as possible.  Cover the pan tightly with foil and cook in a 375 degree oven for about 1 1/2 hours.  Every so often, remove the foil and turn them.  For the last 20 minutes or so, leave the foil off and turn up the oven to 400.


This picture is what the sauce looks like just before serving.  I wanted to add some fresh spinach and more fresh basil at the very end, so that they wouldn't get over cooked


I decided garlic mashed potatoes would be great to spoon this incredible sauce over, so I "whipped" up a batch (sorry!)  Instead of adding my secret ingredient of regular cream cheese, I had some herb and artichoke cream cheese, and decided to go with that.  It was a good decision!  The final meal was definitely one for the books!