Search This Blog

Friday, November 30, 2012

Hummmmm, what can I do with boneless chicken breasts tonight???


I got home from work at 4:30 and sat down at the computer to try to get a little inspiration for dinner.  I tried to think about what I had made lately, so that I could try something different.  Unfortunately, nothing was "wowing" me, so I thought about chicken, and the chicken breasts I had in the freezer, and what I could possibly do with them...


I know how much my daughter loves stuffing, and I thought.....what if I made some individual chicken delights with their own center of stuffing?  There you go!  Kind of like mini turkey dinners.  There's my plan.... so I run to the freezer and grab a bunch of chicken breasts to thaw.  When they are all thawed, I make up about 2 cups of Pepperidge Farm Stuffing mix, according to the directions, and added some dried chopped onion, and a bunch of parsley
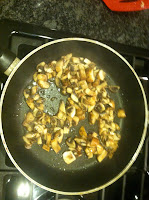
Then I decide some sweet Italian sausage would taste good, so I take two out of their casings, break up,  and cook.  Once I add that, I cook up a handful of Bella mushrooms....in they go, along with a few handfuls of arugula.  Making this kind of stuffing does not require that you measure anything.  Just keep adding and tasting until you're happy with it.


The last two things I add are some Craisins and I sprinkle some Parmesan cheese in.  Oh, and don't forget a little salt and pepper.  Now you're ready to stuff.


Once the chicken breasts are thawed, I put a piece of Saran wrap over it and pound it so that it is flat.  Add as much stuffing as you like (we always like a lot so I pretty much over stuff them!), roll them up and put them in a greased pan, seam-side down.  No string, no tricky stuff, just mold the meat around the stuffing and in they go.

When they are all done, I melt about 2 Tbs of butter and spoon over each rolled up marvel.  Then I take a sleeve of Ritz crackers, crunch them up and sprinkle over the chicken.  Believe it or not, it is now done and ready to go in a 350 degree oven for about 20 minutes.  The chicken is pretty thin and won't take long to cook.  You just want the stuffing to heat through.  It is all cooked, so don't worry about it reaching a certain temperature.


That's all there is to it.  They came out so moist and delicious.  It took me longer to figure out what to make, than it did to actually put it together.  Even though this is a quick and easy dinner,  my mother would say "this one is good enough for company!"


Tuesday, November 27, 2012

Butternut Squash Soup with some interesting flavors...


Whenever I have leftover roasted butternut squash, I can't wait to make soup out of it.  There is just something about the flavor and texture that is just so delicious.


Roasting the squash is so easy.  I cut it up, toss it with olive oil, salt, pepper, a little nutmeg, and curry powder, and roast in a 400 degree oven until it is soft and a little brown around the edges.  It's a good idea to stir it up every once in a while.


I place the cooked squash in a pot, along with some chicken broth, probably about 2 cups.  I use my Cuisinart Smart Stick (hand blender) to puree the squash.  I then add a can of coconut milk, and more curry.  You really have to let the soup cook for a while in order to fully taste the curry.  I also add a fair amount of milk (I use 1%, but you can use whatever you have) as well as some half and half for a little richness.  From this point on, you will be getting the soup to the consistency that you like.  You can use more chicken broth to thin it out as well.  I wanted a lot of soup, so I kept adding milk until the pot was half full!


I really like a pronounced curry flavor, so I probably added a total of about 2 teaspoons of curry, between sprinkling some on the squash when I broil it, and the rest directly into the soup.  Your best bet is to keep tasting it along the way.  Everyone absolutely loved it, so I guess I did something right!


Twice-Baked Potatoes....deadly but delicious


These potatoes are really not that hard to make, which makes me wonder why I don't make them more often.  Probably because they are full of calories and cholesterol....but they are so delicious, and honestly?  How bad can it be to have them once in a while?

I start by baking some idaho potatoes.  When they are done, I cut them open and scoop the potato into a bowl.


I made 4 potatoes, so I added 1/2 a stick of butter, probably about 1/2 cup of sour cream, 1/2 a block of cream cheese, salt and pepper, a handful of bacon bits, about a 1/2 cup of Parmesan cheese, about a 1/2 cup of grated cheddar cheese, and some onion powder.   Use a hand mixer to blend everything together.  And don't forget to taste!  None of these measurements have to be exact.   I always end up adding a little more of this or that, until it tastes just right.


Now for the fun part.  Put the potato back into the skins, and sprinkle some additional grated cheese on the top.  I baked them at 350 degrees for about 20 minutes, until they are heated through and the cheese on top has melted.  Then just a few minutes under the broiler to brown the tops.


Too delicious to ever have left overs!

Monday, November 26, 2012

There are two stuffings in my world, Pepperidge Farm and Bells.... here is the Bells...


So, I grew up with my mom making Pepperidge Farm stuffing.  She would saute some celery and onions, and add parsley, salt and pepper...... done!  and delicious.

When I got married, I was introduced to the "other" stuffing....you know, the one made with Bell's seasoning.  I remember thinking after I ate it, that it had a ton of sage, which is usually delicious in moderation.  So, I now have to make this stuffing to the best of my ability....

I start by sauteing onions and celery in some butter. While they are cooking, I cut up a loaf of stuffing bread, and douse it with milk.  When the celery and onion are done, I add them to the bread and mix.  Sprinkle liberally with Bell's seasoning, salt, and pepper.


I take a sleeve of Ritz crackers, and crush them.  Dump them in as well....


At this point, you need to take a taste, just to make sure you taste enough of the seasoning.  If it is good, put into a baking dish, cover and bake for about 30 minutes at 350 degrees.  When it is done cooking, I take some of the juice from the pan the turkey is cooking in and drizzle over the stuffing.


It really is delicious!


Quite possibly the best onion soup you will ever eat...


My mom made the best onion soup, and I think it was partially because it was simple.  No fancy ingredients....just a great technique that makes it delicious.  Read on.....

Get a bag of pearl onions.  According to my mom, you needed these small onions, and you needed to slice them nice and thin.  I can remember crying as I sliced these onions with my great Aunt Deedee.  She used to love helping my mom in the kitchen, and of course I was recruited to help.  Mind you, this is the most labor-intensive part of the recipe!


Dump the onions and some butter in your soup pot and saute until the onions are transparent.  Sprinkle in some freshly ground pepper, sea salt, and add about an 1/8th of a tsp of nutmeg.  


My mom used to add beef consomme at this point, but unfortunately I could not find it any more, so I just bought Campbell's beef broth.  If you use Campbell's, remember you need to add a can of water for every can of broth...  You can actually use any type of beef broth, but you will need to supplement it with about 2 tsp of "Better than Bouillon" beef paste.  This is much better than beef bouillon cubes....a lot less sodium.  I also added a couple of dashes of Worcestershire sauce at the end....


As they say, the rest is history.   Just let the soup simmer for about an hour.... the longer the better.  Give it a taste to make sure you can taste the amazing flavors. 

For the finishing touch, I took some regular Cesar Salad croutons and put them on a pan.  I sprinkled them with Parmesan cheese and popped them under a broiler until the cheese was melted.  When I served the soup, I added some of the croutons on top.  

I hope you love this soup as much as I do.... It is so special to have a recipe from someone as special as my mom.....

If you like caramelized onions and onion dip, you are going to love this!


I thought I would make a dip to have on Thanksgiving day, just in case folks got hungry waiting for the turkey to get done.... and this is one that is amazing, and so easy.  Start off with a couple of Vidalia onions.  I chop them and throw in a pan with a couple of tablespoons of butter and a drizzle of olive oil, on medium heat.  After about 15 minutes, I turn the flame down and let them sizzle for about 30-40 minutes.  They will start to turn brown and caramelize.


In the mean time, I blend together 4 ounces of cream cheese, 1/2 cup of sour cream, and 1/2 cup of mayonnaise in a bowl. Sprinkle 1/4 tsp cayenne pepper, 1 tsp kosher salt, 1 tsp kosher salt, 1/2 tsp freshly ground black pepper.  Once the onions are done caramelizing, add 1 tsp Dijon mustard and1 tsp balsamic vinegar, blend together and add to the cream cheese mixture.


Now is the time to put this into the fridge over night, so that the magic can happen.  I have to tell you, the flavors that come out in this dip are unbelievable.  There is a little bit of work to this dip, but it is so well worth it!  Hope you enjoy it as much as my family does!


I serve this with Stacy's naked chips, but you could use anything....even spoons!


Sunday, November 25, 2012

To brine or not to brine...that is the question


About two years ago, I heard everyone talking about "brining" their turkey. I knew nothing about this, and it seemed like it was a lot of work, so I didn't pay any attention.  Well.... I became really interested in this brining thing.  I looked up a bunch of different recipes for brine, and found one I really liked.

3/4 cup of kosher salt
3/4 cup of sugar
1 cup of boiling water
1 gallon cold water
pepper
I also pour in some cranberry juice, but this is purely optional

Stir the salt, sugar, and boiling water until everything is dissolved.  Then add the cold water, any spices you would like,  and the juice.  Put the turkey into a brining bag, and pour in the brine.  Keep the bird in the fridge over night.  On Thanksgiving morning, dump out the brine and rinse the bird off.  Dry and sprinkle with the following seasonings..

Pepper, onion powder, garlic powder, thyme and paprika.  I spray the bird with vegetable spray, and put it in the roasting pan breast side down.  Doing this allows gravity to do it's thing... the juice travels down to the breast meat.  About an hour before the turkey is done, turn it over.  Doing this is definitely a little messy, but it is well worth the effort.

I have to tell you, the turkey comes out so moist and tender.  It is definitely attributed to the methodology. I have since brined pork chops, and they too have come out flavorful, moist and delicious.  I have truly been turned into a brine queen.......


This is probably one of the best Chili recipes you should keep


I thought it would be a good idea to make a pot of chili the night before Thanksgiving.  Everyone was coming and going, and if there was something hot and yummy for the taking, folks could just help themselves as they passed by.  I'm sure you all have your favorite recipes for chili, but this one is so easy and always seems to come out delicious.  I can't tell you how many times I have made it and I will get rave reviews!  So here is some background info....this recipe comes from a Wheaton College cookbook that a friend of my mom's gave to me.   You have to write this one down!

2 lbs of lean ground beef
2 cups of onion, chopped
2 cups of celery, chopped
2 large green peppers, chopped


Cook the ground beef first.  When it is done, 
put it in the crock pot and get the veggies cooked.  
When done, add to the hamburger. 


Now for the rest of the ingredients:

1 can of tomato puree
1 can of diced tomatoes
4 garlic cloves, minced
2 tsp. salt
4 tbs. sugar
5-7 tbs. chili powder

I tend to go a little heavier on the chili powder, because I like to really taste that flavor.  Stir everything together, turn on the crock pot, and walk away!  Every so often walk by and give it a stir.  


It is amazing how it totally changes in appearance after hours of cooking!


The last ingredient I add is the kidney beans.  If you add them too early, they fall apart.   I like the medium red kind, but if you have a preference, by all means, add whatever kind of beans you like.  

That's it.  I usually have to add some salt and pepper when I taste it.  I also add a couple of shots of Frank's Hot Sauce, because I like a little heat in my chili.  But, it is totally up to you and how hot you like your chili.

I really hope you will try this recipe some time.  It really is a winner!


Sunday, November 18, 2012

Stuffed Artichokes


Growing up, my mom would cook artichokes on special occasions, such as a holiday or someone's birthday.  They were a real treat, almost a delicacy, so we really enjoyed them when we had them!  She would steam them, make a Hollandaise sauce, and we would pull off each leaf, dip it in the sauce, and use our teeth to scrape off the fleshy part of the leaf.  Such wonderful, delicious memories!


Today, my favorite way to cook these bad boys is by stuffing and baking them.  I decided I needed to use up 5 fresh artichokes I had in my fridge that were starting to look a bit sad.  I pulled off all of the lower leaves, and cut half of each of the remaining leaves off.  I put them in a saucepan, with a small amount of water, covered the pan, and simmered them for about 20 minutes.  I took them out, let them cool, and then made a stuffing mix.  


I had some stale artesan garlic bread, so I cubed it and threw it in a blender, along with some olive oil, Parmesan cheese, Italian seasoned bread crumbs, salt and pepper, and some crushed red pepper.  Add enough oil so that the crumb mixture is moistened and holds together.  I dumped it into a bowl, mixed in a couple of tablespoons of dried onion, some shredded mozzarella cheese, parsley, and 2 crushed cloves of garlic.  I took about 3 slices of boiled ham, diced them up and threw them in too!  After mixing it all together, I stuffed the artichokes.


I put them in a baking dish, drizzled a little more olive oil over the tops, added a small amount of water in the bottom, and covered it.  I cooked them in a 350 degree oven for about 30 minutes.  Look how beautiful they came out!


Artichokes have to be one of my favorite things in the world to eat.   All of my kids love them, and of course I take full credit!  How may kids do you know who have grown up with artichokes and love to eat them???

Don't be affraid to try them.  It is a little bit of work, but they come out so good.....so worth the effort!